Your Cart is Empty


614-71B
MRS-4 X-Y/R Cleaning, Re-coating and Re-calibration
MRS-4 X-Y-Z/R Cleaning, Re-coating and Re-calibration
MRS-3/4/5 Cleaning and Re-coating only
The 10x to 200,000x standard for Scanning Electron Microscopy
with 1/2, 1, 2, 50 and 500µm pitch patterns and X & Y Micro-ruler

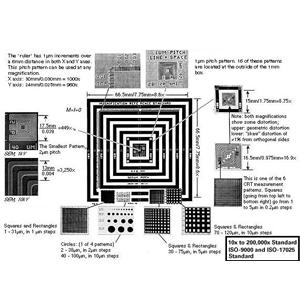
Selected MRS-4 Patterns in Greater Detail
The fifth generation MRS-4.2 is fabricated using the high accuracy direct write electron beam manufacturing equipment. The pattern is anti-reflective chromium (30nm Cr2O over 40nm Cr) on quartz. Imaging in both secondary and back scattered mode is very high. The pattern is coated with a proprietary conductive material which allows for SEM imaging at any accelerating voltage.
The MRS-4 has groups of nested squares with pitches of 1/2µm, 1µm, 2µm, 50µm and 500µm. The largest pattern has an overall dimension of 8mm square with lines and spaces of 250µm. This can be used to check magnifications between 10 - 100x. The 50µm pitch patterns are useful from 100 - 1000x magnifications. The 2, 1 and 1/2µm pitch patterns allow calibrations up to 200,000x. Incorporated into the standard are X & Y rulers with 6mm length with 1µm increments.
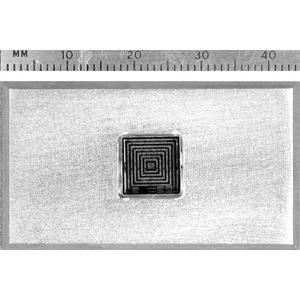
The overall size of the MRS-4 is approx. 9 x 9 x 2.3mm. Since the standard is made on quartz, it easily chips. We highly recommend ordering the optional protective retainers for the MRS-4.


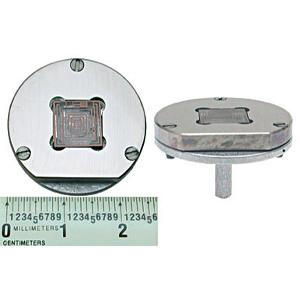
The standard is mounted in the retainers using an ultra high vacuum compatible, conductive silver epoxy. There are two retainers available:
For the #614-5 SEM/R protective retainer can be mounted on a 25mm pin stub as an option (order #614-62). A special version of the MRS-4 is available for (S)TEM with a 3mm diameter and a thickness and a thickness of 500µm. This will only show the central features and can be viewed with secondary and backscattered electrons, not with transmitted electrons. AccuracyMeasurements by the NPL in the UK (counterpart of NIST) have demonstrated that the accuracy of the 500µm was ±0.25µm, and ± 0.1µm for the 50µm and 2µm patterns. The 1µm and 1/2µm patterns have an accuracy of ±0.04µm Certification reportThe certification is done following ISO guidelines. Each MRS-4 has a unique serial number engraved on the standard. Certification includes the serial number, certification date, operator, instrumentation used, actual pattern measurements and measure of accuracy. NIST = National Institute of Standards and Technology, USA NPL = National Physical Laboratories, UK (counterpart of NIST) |
Sample Certificate for MRS-4 (301KB PDF)
Details of Traceability to NIST, NPL or ISO 9000 Compliance
All standards are carbon coated. Can be supplied uncoated by specific request.