Your Cart is Empty


614-1
MRS-3 Reference Standard, X, Not Traceable, without Protective Retainer, Unmounted
MRS-3 Reference Standard, X-Y, Traceable, without Protective Retainer, Unmounted
MRS-3 Reference Standard, X-Y-Z, Traceable, without Protective Retainer, Unmounted
The 10 x 50,000x Pitch Standard for Scanning Electron Microscopy Details of Traceability to NIST, NPL or ISO 9000 Compliance
The MRS-3 is fabricated using the high accuracy direct write electron beam manufacturing equipment. The pattern is anti-reflective chromium (30nm Cr2O over 70nm CR) on quartz. Imaging in both secondary and back scattered mode is very high. The pattern is coated with a proprietary conductive material which allows for SEM imaging at any accelerating voltage.
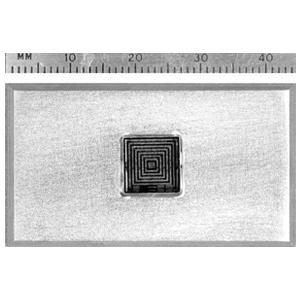
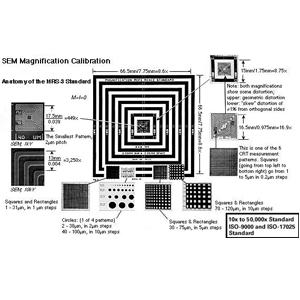
The MRS-3 has groups of nested squares with pitches of 2µm, 50µm and 500µm. The largest pattern has an overall dimension of 8mm square with lines and spaces of 250µm. This can be used to check magnifications between 10 - 100x, The 50µm pitch patterns are useful from 100 - 1000x magnifications. The 2µm pitch allows calibrations up to 50,000x.
The overall size of the MRS-3 is approx. 9 x 9 x 2.3mm. Since the standard is made on quartz, it easily chips. We highly recommend ordering the optional protective retainers for the MRS-3.

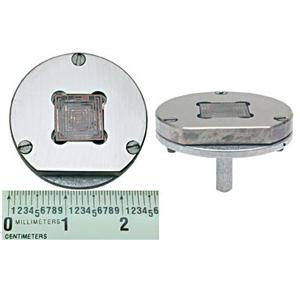
| Optional Protective Retainer 614-5 and Optional Pin Stub Mounting 614-62 | Optical Microscope Adapter OM/R 614-6 |
The standard is mounted in the retainers using an ultra high vacuum compatible, conductive silver epoxy. There is a choice of two optional retainers:
The #614-5 SEM/R protective retainer can be mounted on a 25mm pin stub as an option (order #614-62)or a Ø25 x 10mm x M4 cylinder mount (order #614-63) as an option.
A special version of the MRS-3 is available for (S)TEM with a 3mm diameter and a thickness and a thickness of 500µm. This will only show the central features and can be viewed with secondary and backscattered electrons, not with transmitted electrons.
Measurements by the NPL in the UK (counterpart of NIST) have demonstrated that the accuracy of the 500µm pitch pattern was ±0.25µm and ±0.1µm for the 50µm and 2µm patterns. It goes without saying that these reported results from NPL are highly conservative. Our customers have also sent MRS-3's to NIST. The NIST data shows better accuracy than NPL reports.
The certification is done following ISO guidelines. Each MRS-3 has a unique serial number engraved on the standard. Certification includes the serial number, certification date, operator, instrumentation used, actual pattern measurements and measure of accuracy.
MRS-3 is more radiation resistant. (It handles about 10x the electron beam current density and provides higher scanning electron microscopy imaging contrast, even at 500eV. Patterns have been added to help calibrate particle size counting systems and determine the spatial resolution in video and surface chemical imaging systems. Highest accuracy equipment used.
Measurements in the X-Y Plane can be certified to NIST and NPL standards. Z plane measurements are traceable to a NIST standard only.
NIST = National Institute of Standards and Technology, USA
NPL = National Physical Laboratories, UK (counterpart of NIST)